|
.......................................................

Many of the activities on these pages may require adult supervision.
Be sure to tell a grown-up about what you're planning and ask for permission before getting started.
To keep you from dropping your clothes on the floor.
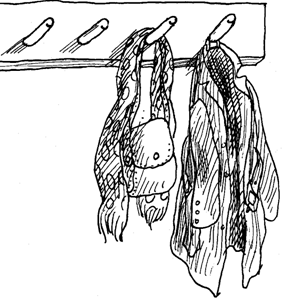
There always seem to be more things to hang up than hooks to hang them on, so this little item should be helpful in just about any room.
Find a board the length of the peg hanger you wish to build. Sand the ends and edges well. Then get a wooden dowel 1/2 or 3/8 inch wide, and cut it in 3 inch pegs, as many as you need. Using a brace and bit, drill holes along the length of the board to accommodate the width of the pegs. Tip your brace and bit so that the holes are drilled at a slight angle. Go almost all the way through, but be sure to stop short of going through to the other side. Sand the holes.
Sand the ends of the 3 inch pegs. Put a few drops of white glue on the end of each dowel peg and push the glue end into a hole. Remove any excess glue right away with a damp paper towel. The dowels should all angle slightly upward.
Give the peg hanger a final sanding. Then dust it and paint it with water-base paint. When dry, nail it or screw it inside a closet or on a wall. Be sure the pegs point up.
Click here for CHRISTMAS-TREE ORNAMENTS
Click here for MORE IDEAS!
|